Panoptiq Portal User Guide
1 The Panoptiq Portal Basics
Panoptiq Portal is a place to store, manage and share your digital cases created with the Panoptiq slide scanner. Slides can be organised into cases, and cases into folders in anyway you like. Slides can be annotated and snapshot images created and saved for use outside of the portal.
The real value of the Portal comes when you start sharing your slides and cases with others. Quickly invite others to look at individual slides, cases or folders of slides - whether or not they are existing Portal Users. Easily manage permissions to tailor access for your particular needs. Copy slides to allow independent views, in instances where you want sharing or collaboration without worrying about altering the original copy, or allowing comments or annotations to be visible to other users.
1.1 Sharing
Sharing can be done in two different ways. Firstly you can share you slides to only a specific group of existing Portal users. Or it can be done in a public fashion, where anyone has the ability to look at your slide. By default, slides you share can't be copied, edited or shared by the people you share to. However you can change those permissions if you need to.
To setup sharing, you first use the sharing controls to setup who you'd like to share to (specific users or public) and what permissions you'd like to give them. Then you can use the "copy link" functionality to generate a URL link to the specific view of that slide, that you can then email, tweet, post or forward to people in the way that best suits you.
1.2 Slide Navigation
Once you have a slide open, it is quick to easily navigate around without lots of scrolling.
Of course, like any good application, zooming and panning uses the standard UI conventions of whatever device you're using. Mouse wheel and click and drag on PC's, dragging and pinching on mobile devices.
However this can be very slow and tedious when looking at images, so we've got a few great extra features to make viewing the slide a lot faster and easier.
Minimap
The first way to navigate is through using the minimap, which is the bottom right of each viewport and can be shown or hidden as required. The minimap shows the entire region, with the current viewed area shown in blue. Clicking in the minimap, or dragging the blue area around is a very fast way to change where you're looking at.
Click zoom
The second way is through our intelligent Click zooming. Panoptiq Portal has two different zoom modes - which we call "Survey" and "User". The use here is to quickly switch between a detailed zoomed in view at the points you want, then quickly jump back to seeing the entire slide or region. When you're in survey mode, double clicking anywhere on the image quickly zooms in to that region in "user" mode. Double clicking again takes you back to survey mode, where you can see the entire slide or region again.
This way you can quickly and easily zoom in to multiple regions of interest on the slide with minimal user input. To help make this easier and faster, if you're zoomed in with User mode, and then change the magnification level, we remember that new zoom level for you.
Regions and Annotation display
In the sidebar on the left of the screen, we show you a list of embedded higher magnification subregions, z-stacks and annotations that have been created with the slide. Simply clicking on each will automatically jump you to showing region or annotation zoomed in.
Uses
For tumour boards you can quickly setup a group of slides to review in real-time, digitally, during the board meeting. The whole slide can be shown and discussed, without the constraints of only fixed sized slide photos taken before hand. Before or after the meeting you can easily mail a URL link to a set of slides to all the tumour board members, or residents, for them to review anytime they like, during or after the board meeting. Case histories can be quickly brought up and displayed when you like.
Consultations can now be handled by simply emailing a URL to a colleague. They can open, review, comment on the entire slide wherever and whenever they like.
Resident training can now be done digitally, with easy access to cases anytime and anywhere.
Conference presentations can now be interactive. No longer constrained to a single, static photograph of a glass slide, you can now interactively display the slide during your presentation. And in your notes hand out a URL to attendees to invite them to interactively view and explore themselves.
The possibilities are only limited by your imagination and your needs.
2 Main View
This section is divided into three main subsections that explain the main viewer features based on the type of resource that is being viewed. Section 1.1 is for "Top horizontal bar" which is shared by both scans and z-stacks. Sections 1.2 and 1.3 discuss scans and z-stacks features respectively.

2.1 Top horizontal bar

The top horizontal bar consists of the following items:
Opened cases drop down menu (name of the current case with an arrow): A drop down menu of opened cases will appear when this item is pressed. To open any of the cases select the corresponding item from the drop down menu.
Title: the title of Scan or Z-Stack that is currently being viewed appears next to the title of the case. If the Scan or Z-Stack has not been assigned a title then it will show the type of the resource (Scan or Z-Stack) by default.
Capture magnification level: Located next to the title. It indicates the magnification level at which this case has been captured.
Metadata (): this item opens a panel that allows users to change name and description of the Scan/Z-Stack. Also it contains magnification, microns per pixel and revision history information.
Magnification level: this item is located on the rightmost side of the top horizontal bar. It indicates the current magnification level at which the Scan or Z-Stack is being viewed, as well as the current viewing mode (Survey, or User-defined).
2.2 Scan View Features
Create shortcut (): creates a shortcut for the current case.
Snapshot (): download a screenshot for any region of the scan. choose the name, file type and scale bar color (optional) of the snapshot. Please refer to section 3 in the use cases manual for more information about snapshots.
Annotations ( and ): These buttons let you add rulers or ellipses to the scan. You can also use the following keyboard shortcuts "R" for ruler and "E" for ellipse.
Toggle Annotation Visibility (): Hides/shows all embedded Scans or Z-Stacks in the current Scan.
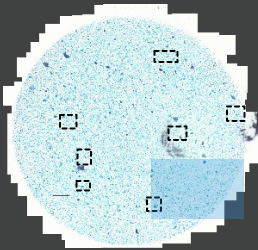
Minimap: The minimap is located on the bottom-right of the scan view. It shows the entire scan and highlights the current visible area with the blue box. Minimap can also be used for navigation to any region on the scan by dragging the blue transparent box to the desired region. The minimap lets you see the entire slide for easy navigation and region selection. In the minimap, your current view is shown by the blue area. You can click on a region of the slide, or drag the blue box around, to quickly see a different region. Embedded Scans or Z-Stacks in a scan are visible on the minimap. Scans and Z-Stacks are indicated as boxes with dashed borders. Regular annotation (Ellipse and Ruler) appear on the minimap as they appear on the scan.

Opening embedded Scans and Z-Stacks: double click on the desired Scan or Z-Stack in the scan and it will be opened.
Zooming: zoom in and out of the view by scrolling.
Navigation: Click and drag the scan to move across the screen. Also navigation can be done through the minimap by dragging the blue semi-transparent box to the desired region.
2.3 Z-Stack View Features
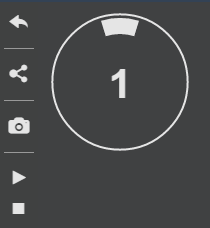
Return (): opens the parent scan of the Z-Stack.
Create Shortcut (): creates a shortcut for the current case.
Snapshot (): download a snapshot of the current frame, choose name and file type.
Playback ( and ): Z-Stack playback can be started by pressing the "triangle icon" and it can be paused at different locations by pressing the " rectangle icon".
Zooming: zoom in and out of the view by scrolling.
Navigation: click and drag the Z-Stack to move across the screen.
3 Left Side Panel

The left side panel of the web viewer consists of five main components which are navigation bar, opened cases list, active case, resource tree, and viewing mode selector.
3.1 Navigation Bar
The horizontal menu bar consist of the following items:
File manager (): Opens the file explorer. Refer to section 4 for more information about file explorer.
Full screen mode (): Opens the viewer in full screen mode or return to normal mode if the viewer is already in full screen mode.
Setting drop down menu ():
- Preferences: This item opens a panel that allows you to hide/show minimaps by checking or unchecking a box. Refer to section 1.2 for more information about minimap. It also allows for changing the default color of annotations.
- Open Uploader: This item opens panotiq view which allows for case uploading. Refer to section 5 for more information about Panoptiq View.
- Open a shared link: This item opens a panel that allows you to open another case by inserting a URL. Refer to section 6 for more information about shortcuts.
- Go to home page: This item redirects you to the home page of the website.
- Help: This item redirects you to a webpage that contains the user manual of the web viewer.
- Sign out: This item signs you off the website and redirect you to the main page of the website.
* The Setting drop down menu can be opened by pressing on () icon that is located on the rightmost of the navigation bar.
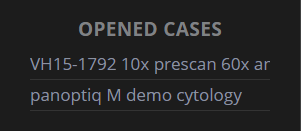
3.2 Opened Cases
This is a list of all cases that are currently open. Clicking on any item in this list will open it in the current active viewport. Cases can be closed by clicking the "X" icon, which appears when the cursor is hovered over the name of a case. You can see the list of cases you've opened in the Opened Cases area. Clicking on a case will show it in the current viewport, while you can close the case by clicking the "X" that is shown when you hover over the name.
3.3 Active Case
This panel displays the name of the current active case in green. It also provide quick access to the following options:
- Save button(): Saves all changes that have been done to the case during the current session.
- Case setting(): For more information about case settings, please refer to section 5.
- Case Sharing(): This panel allows users to share the case publicly and privately. For more information about sharing please refer to section 6.

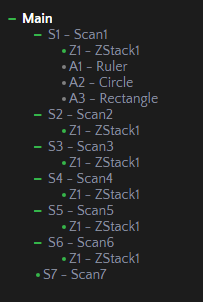
3.4 Resource Tree
The resource tree enables you to easily navigate between the Scans, Z-Stacks or Annotations of the current active case by clicking the name of any Scan, Z-Stack, or annotation on the list. It also indicates the Scan or Z-Stack that is opened in the current viewport by showing its name bold and white.
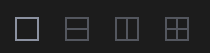
3.5 Viewing Mode
Changing the viewing mode allows for viewing multiple images simultaneously. The buttons to control the viewing mode can be found at the bottom of the left sidebar. The options are; one viewport, two horizontal viewports, two vertical viewports, or four viewports each occupying a quarter of the screen.
4 Case Settings and Sharing
The Case Settings window can be accessed by right-clicking on the desired case in the file explorer and clicking the "Settings" item in the dropdown menu. Alternatively, if the specified case is already opened then Case Setting can be opened by clicking the settings icon () from the left side panel. Case settings include the following features:
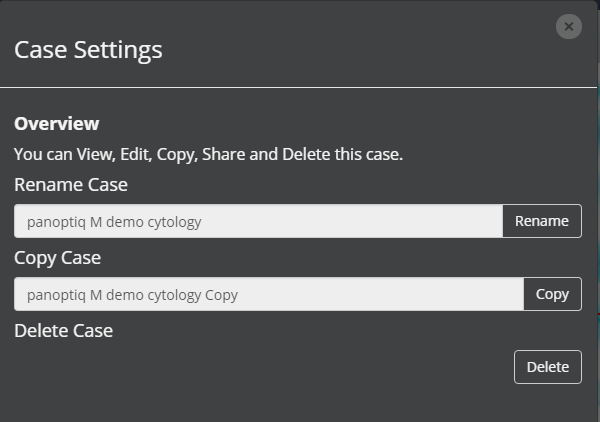
4.1 Rename, Copy and Delete
- Rename a case: Enter the new name of the case and click "Rename".
- Copy a case: Enter the name of the new copy of the case and click "Copy".
- Delete a case: Press the "Delete" button to delete the case.
4.2 Case Sharing
There are two main types of sharing:
Private sharing: You can share cases with other users by adding the username or email address of the user and pressing "Add". The Read permission will be given to the specified users by default. Share, Copy and Edit privileges can be added to a permission by checking the corresponding checkbox before clicking "Add". When the case is shared with other users, it will show up inside their "Shared" folder in the file explorer.

Public sharing: This will allow you to make the case publically available to anyone. It can prove useful when sharing a shortcut to a case. For more information about shortcuts please refer to section 6.3. Once made public, a case can be read by anyone, given they have a shortcut that gives them access to it. Additionally, the owner of the case can allow sharing, cloning and editing.

Note: public sharing is only available for cases you own.
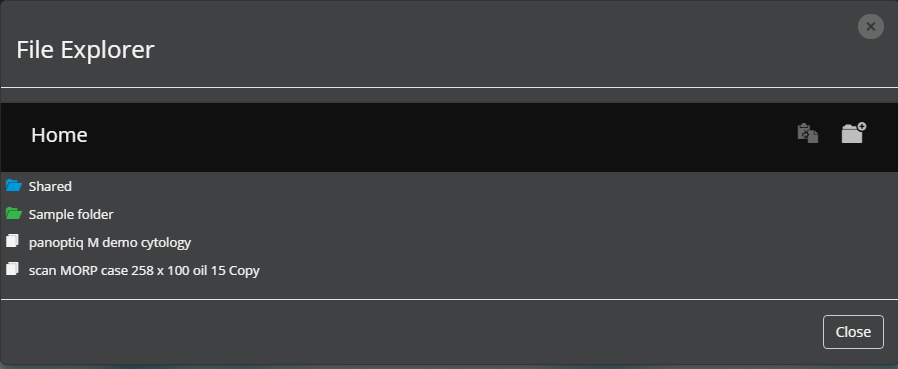
5 File Explorer
The file explorer window appears automatically when you open the web viewer. It displays your own folders and cases, as well as the ones that have been shared with you - those can be found in your "Shared" folder.
5.1 Basic Operation on Folders and Cases
- Double click on a file (case or folder) : Open a case or enter a folder.
- Right click on a folder: opens menu that includes the following options: open, cut, rename, share and delete. Some of the the options may not show up due to insufficient permissions.
- Right click on a case: opens menu that includes the following options: open, cut and settings. Some of the the options may not show up due to insufficient permissions. Please refer to section 3 for more information about case settings.
5.2 Creating New Folders

To create a new folder, click the "New Folder" button located on the top-right of the file explorer. This button is disabled while inside the "Shared" folder and its children.
5.3 Moving Folders and Cases
There are two main options for moving folders and cases:
- Drag and drop the file in the desired folder.
 Cut and Paste. To cut a folder or case, right click on it then select "Cut" from the dropdown menu. Navigate to the desired location and click the "Paste" button that is located on the top-right of the file explorer.
5.4 Edit Files (Rename and Delete)
Rename file: Right click on the desired folder and select "Rename". This feature is only available when the user has "Edit" permission to the specified folder.
Delete: Right click on the desired folder and select "delete". This is only available for folders you own.
5.5 Folder Sharing
Folders can be shared with other users. Refer to section 6.4 for more information about sharing folders and their content.
6 Panoptiq View (Desktop Software)
Panoptiq View (the latest version is 4.11) is required for uploading cases to the cloud. You can launch it from the web viewer, or directly from your computer.
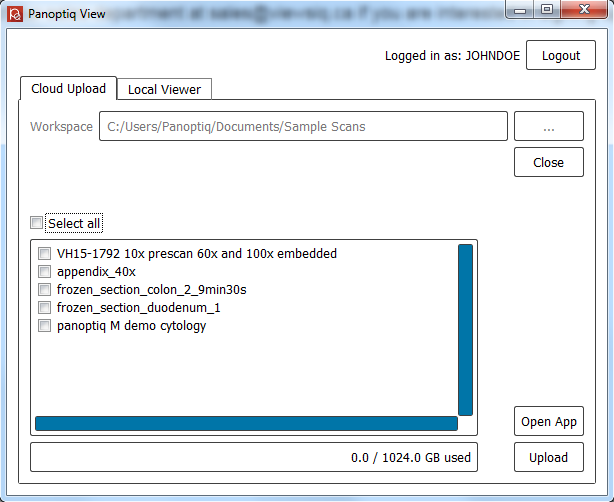
6.1 Cloud Upload
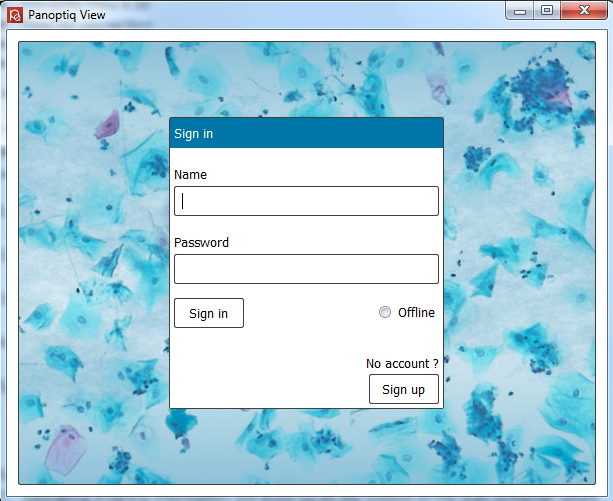
Cloud upload requires online user authentication, If you do not have an account press the signup button and it will redirects you to the signup web page. Sign in with the same username and password that you use for web viewer account (make sure the "offline" checkbox is NOT checked). The following steps are required to upload a case:
- Select the "cloud upload" panel and specify the workspace by opening the folder that contains the desired cases and press the open button.
- All cases in the workspace folder will show up inside the cases container with a checkbox next to each case, you can select cases individually by checking the corresponding checkbox or select all of them by checking "select all" checkbox that is located on the top left of the cases container.
- Once you select the desired case(s) press the upload button that is located on the bottom-right of the panel. Cases will be uploaded consecutively.
- Uploading progress information will show up on the bottom of the cases container which will indicate the name of the current case that being uploaded and download percentage.
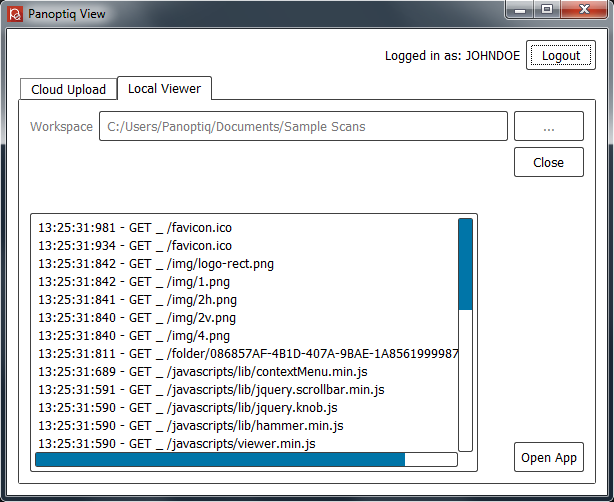
6.2 Local Viewer
The local viewer can be used to view cases locally without uploading them on the cloud. This feature can be used without having a Panoptiq Portal account. You may sign in with your account or anonymously. To sign in anonymously press on the "offline" radio button and then "Sign in as anonymous" button will appear on the bottom-left of the panel. The following steps are required for local viewing:
- After signing in, open the "Local Viewer" tab and specify the workspace by opening the folder which contains the desired cases and press open button.
- The viewer will then open in your web browser as it would on Panoptiq Portal.
- The file explorer of the web viewer will contain all cases that exist in the workspace that has been selected.
- To launch the web viewer press on the "Open App" button that is located on the bottom-right of the panel.
7 Case Sharing
In order to share a case publicly or privately, you must open "Case Sharing" panel. This panel can be opened by following one of these procedures:
- If the desired case is already opened and it is the current active case, then its case sharing panel can be opened through "Active Case" that is located on the left side panel by clicking on the sharing icon () underneath the case name. OR,
- Open the file explorer, right click on the case name inside the file explorer and select "Share".
7.1 Private Sharing
Once the "Case Sharing" panel is opened, follow these steps to share a case privately:
- Select the "Specific People" tab if it is not already selected.
- Input the usernames or email addresses of the users you would like to share the case with. Users can be separated by commas or spaces.
- Select zero or more of the special permissions options; Share, Cone and Edit by checking the corresponding checkbox. Note that all permissions have "Read" privileges by default.
- Press "Add".
7.2 Public Sharing
Once the "Case Sharing" panel is opened, follow these steps to share a case publicly:
- Select "Everyone" tab, if not already selected.
- Turn on the "Public sharing" on/off button.
- Select zero or more of the "public permissions" options; Share, Copy and Edit by checking the corresponding checkboxes. Note that all permissions have "Read" privileges by default.
- Click the "Copy link" button that is located on the top of the tabbed panel and the link will be copied automatically.
- OPTIONAL STEP: If you wish to add text to the link follow these steps:
- Close the case sharing panel, if you have opened the "Case Sharing" panel from file explorer then double click on the case to open it.
- Click on the "Create Shortcut" icon () located on the top left of the main view panel to open the shortcut panel.
- Add text to the link.
- Click on the "Copy link" button and the link will be copied automatically.
7.3 Shortcuts
Shortcuts can be generated to provide direct links to specific regions on an image. The links can be accessed by the owner of the case, or anyone with the permission to access it.
7.3.1 Creating a Shortcut
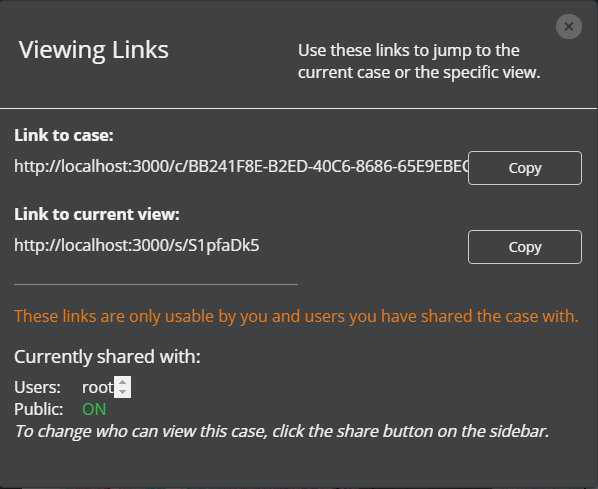
Shortcuts can be created by pressing the "Create Shortcut" icon () located in the top left of the main view panel. The shortcut panel will show the types of links; one for the case and the second is for the current view of the case. To copy one of the links press on the corresponding "Copy Link" button next to the "Url" text field and the link will be copied to your clipboard.
The bottom section of panel shows a list of users who have permission to access the case privately. It also indicates whether the public sharing is set on or off.
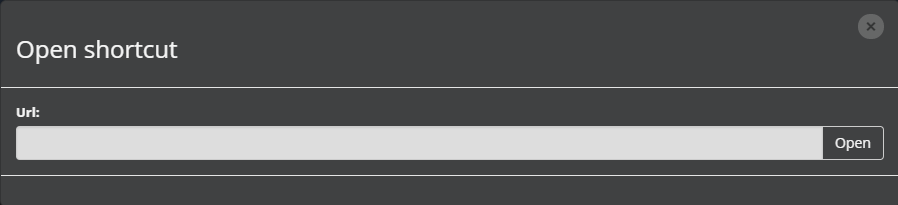
7.3.2 Opening a Shortcut
In order to open a shortcut, you must be signed in to the portal viewer. The link can be opened by simply inputting the url into the browser's address bar. Alternatively, if you would already have open cases which you do not wish to lose, click the Settings drop down menu (), select "Open a shared link", then input the URL and click the "Open".
7.4 Folder Sharing
To facilitate the sharing multiple cases with other users without the need to share each case individually, you can move the cases inside a folder and share the folder itself.
Right click the desired folder and select "Share" item, the share panel will appear. The right side of the share panel allows users to create a new permission for another user and right side shows a list of current permissions. All permissions have the 'Read' privilege by default. Share, Copy and Edit privileges can be added by checking the corresponding checkboxes. Users can either add a new permission to the existing permissions list or replace existing permissions by choosing "Extend existing permissions" or "Overwrite existing permissions" respectively..This feature is only available when the user has "Share" permission to the specified folder.
Refer to section 3 for information about renaming, cloning, deleting and sharing a case.

8 Exporting
8.1 Scans Snapshots
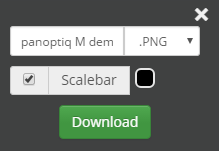
To export a snapshot of a specific region on a scan, click the camera button () then click and drag the mouse over the target region. You may modify the selection area and location by resizing and moving the selection box. The following are the available setting options:
- Change the name of the snapshot. The file name is the same as the name of the case by default.
- Select the file type in which the screenshot will be saved (PNG, JPEG, TIF and BMP).
- For images where the measurement is calibrated, you can include a scalebar with the exported snapshot. The color of the scale bar can customized.
8.2 Z-Stacks Snapshots
You can download a snapshot of the current Z-Stack frame by clicking the camera button () located in the top-left corner of the viewport. After clicking the button, a window will appear prompting for the file name and type (PNG, JPEG, TIF, or BMP).
